Thursday, March 31, 2011

Garden Manor Stamped Scene


I'm on a roll! I have a collection of Betty Neels books which I keep and re-read every so often! Her books are so sweet and Old Fashioned, plus I love her style of writing! So anyway, all the newer books have a nice watercolor scene on the cover so I got the idea to create a few scenes using my book covers for inspiration! This is my take on this one! Boy was I hard pressed to figure out a way to create dense foliage! There are not too many detailed current foliage stamps to work from but that's where it gets fun...Seaching through sets and finding stamps that can be made to look like something else and I know I haven't looked through my sets enough but I love the top of the oak tree for this look!  

The fountain I drew...very roughly and the house was just sponged with a post-it mask along the roof line and then I drew the windows very roughly! The bubbling water in the middle of the fountain is a torn piece of copy paper glued to the CS! Water at the bottom was sponged and then the edges sponged again with a darker color after repeatedly stamped with the oak tree and vine w/leaves! The middle and ground were sponged and around the fountain. I also shaded with River Rock marker around the water and edges of foliage.
This really was a fairly simple card to make and it really helps to look at something to get perspective and placement!
I dont know, I thought it came out pretty good especially because I don't draw well! LOL

As I did in the scene yesterday, I used the Brayer to fill in the top middle with Bashful Blue ink first. I then stamped these two stamps over and over to create dense foliage using just the upper part of the Oak tree and River Rock ink on the left side and then both stamps over and over on the right side using Old Olive ink.
Try it or something that inspires you to create a scene!

~Stamps: Lovely as a Tree, Pocket Silouettes, Elements of Style (greeting)
~Paper: Whisper White CS, Pear CS, Bashful Blue CS.
~Ink: pads and markers; Old Olive, Bashful Blue, Not Quite Navy, River Rock, Garden Green, Crumb Cake, Marina Mist, Pear Pizzazz, Soft Suede. Versa Mark.
~Accessories: Brayer, White Embossing powder, Heat Gun, Sponges, Basic Pearls, Decorative Label Punch, White Gel Pen.

Tuesday, March 29, 2011

Flower Field

This card was inspired by the cover of a book I just recently read! I also have been itching to use my brayer and create some kind of scene with Spring approaching! I started with a Whisper White Panel and brayered the sky with Bashful Blue ink first and then stamped the foliage adding a few inked flowers on the bottom half. Then I brayered the bottom half sides with Pear Pizzazz, leaving the middle part to add in River Rock and Crumb Cake all with the brayer.
I added a few extra flowers and sponged a line of Old Olive in the middle to create a break between sky and land! Using the brayer I added Marina Mist to the very top of the sky and edges of the panel as well as adding Garden Green to the very bottom to darken the edges!

White Gel Pen highlights were added for detail. I used the Spritzer Tool and Crumb Cake Marker just along the bottom middle part. 
~Stamps: Pocket Silhouettes, Occasional Quotes (L-3)
~Paper: Pear CS, Whisper White CS, Bashful Blue CS, Peach CS.
~Inks: Versa mark, Classic Pads; Pear Old Olive, Garden Green, Bashful Blue, Marina Mist, River Rock, Crumb Cake, Markers; Peach, Daffodil..
~Accessories: White EP, Heat Gun, Basic Pearls, Brayer, Decorative Label Punch, Modern Label Punch, Itty Bitty flower Punch, White Gel Pen, Color Spritzer.

Wednesday, March 23, 2011

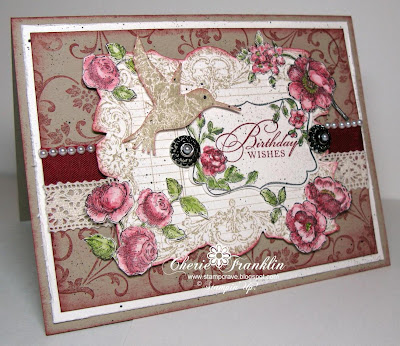
Vintage Birthday Elements

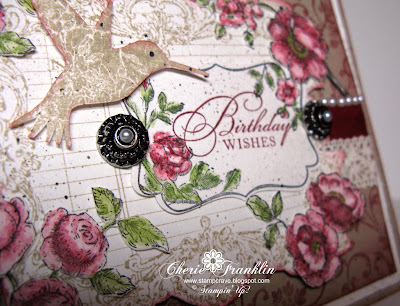
I made this birthday card for a close friend using Elements of Style, Notably Ornate and Four Frames stamp sets. The Greeting is from Watercolor Trio set! I watercolored the flowers using Cherry Cobbler, Ridinghood Red, Regal Rose, Old Olive and Garden Green Watercolor Crayons then cut out clumps of a few flowers to fit around the frame!

I glued a Basic Pearl to the top of each Antique Brad. The background was also spritzed with Soft Suede marker and the Spritzer tool.
~Paper: Crumb Cake CS, Shimmery White CS.
~Ink: Basic Black, Crumb Cake, Cherry Cobbler, Soft Suede marker.
~Accessories: Antique Brads, Basic Pearls, Cherry Seam Binding, Decorative Label Punch, Dimensionals, Aqua Painter, Crayons, Spritzer Tool, Sponge.

Tuesday, March 22, 2011

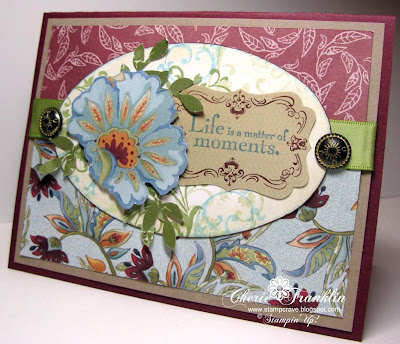
Paisley Oval Flowers

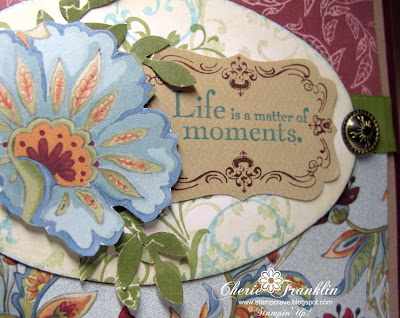
This new Paisley Petals DS paper is so busy, it really stands well on it's own but I decided to cut out a bloom from the paper to add to the oval frame I stamped, using the same colors in the paper and Elements of Style stamp set! I also added a few leaves with the Two-step bird punch around the cut out flower! A very simple card using the Big Shot and the Scallop Oval die minus the scallop, the Decorative Label punch and Four Frames set!

~Stamps: Elements of Style, Four Frames
~Paper: Burgundy CS, Crumb Cake CS, White CS Oval, Paisley Petals DS paper.
~Inks: Burgundy, Marina Mist, River Rock, Pear Pizzazz.
~Accessories: Vintage Brads, Celery Satin Ribbon, Two-step bird punch, Decorative label punch.

Thursday, March 17, 2011

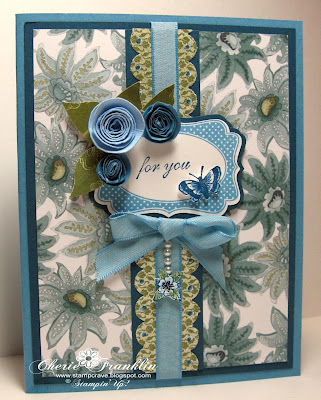
Paisley Blooms in Blue

Love this new Paisley Petals DS paper! Available to order next month!
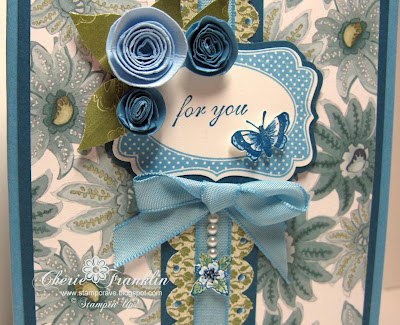
For this card I started with the blue flowers then added the scallop punched strip down the middle.
The leaves behind the rolled flowers are from the Two-Step Bird punch. The frame is stamped with Marina Mist ink, the butterfly stamped with Not Quite Navy ink. The center rolled spiral flower made with textured Bashful Blue CS and the other two made with Marina Mist CS.
~Stamps: Clearly For You (Occasions Mini), Four Frames
~Paper: base card Marina Mist, Not Quite Navy, Paisley Petals DS paper, White CS. 

I used the White Gel Pen to make dots on the scallops but because of the pattern you couldn't see them so I went back over the dots with Not Quite Navy marker which gave them an interesting look!
~Ink: Marina Mist, Not Quite Navy pad and marker, Bashful Blue marker, Pear Pizzazz marker.
~Accessories: Two-step Bird punch, Decorative Label punch, Scallop Border punch, Marina Mist Taffeta Ribbon, Basic Pearls, 1-3/8" Circle punch, 1-3/4" Circle punch, Crystal Effects, White Gel Pen.

Ruffled Bliss

I seem to really like this particular layout for now anyway! LOL
I thought I'd go ahead and use this very pretty 'Bliss' sell-a-bration set along with Four Frames set which is available for purchase next month! I love that the four frames can be stamped and then punched out with the XL Decorative Label punch! This is a simple card with a small amount of water coloring and a striped ribbon ruffle created by pulling a string in the center of the ribbon and sliding the ribbon down to create a ruffle!
~Paper: Blushing Bride CS, White CS, Black CS.
~Inks: Blushing Bride Pad and marker, Basic Black Pad, Cherry Cobbler marker, Old Olive marker, Pear marker.
~Accessories: Aqua Painter, Basic Pearls, Scallop Border Punch, Soft Subtles Brads, Pink Striped Ribbon, Decorative Label Punch, Dimensionals, Big Shot, Beautiful Wings Embosslit!

Monday, March 14, 2011

Paisley Teapot Card

I was rummaging through my files and came across this teapot card pattern so I thought I'd make a teapot card using the new Paisley Petals DS paper which will be available in the 2011-2012 catalog and is available to order during the month of April with a $ 20 purchase! Nice!
I traced two of these teapots on Whisper White CS then cut them out and glued just the handles together so the card actually opens on the 'spout' side! I punched out a jewelry tag and attached Linen Thread to act as a tea bag! The rose was made using the Fancy Flower punch, the leaves using Island Floral die with Pear CS textured with the Elegant Lines Embossing Folder!

~Paper: Whisper White CS, Paisley Petals DS paper, Pear Pizzazz CS, Cherry Cobbler CS.
~Accessories: Cherry Cobbler Seam Binding, Crystal Effects, Sticky Strip, Jewelry Tag punch, Linen Thread, Fancy Flower punch, Big Shot, Elegant Lines Embossing Folder, Island Floral Die.


Teapot pattern


Friday, March 11, 2011

Glitter Daisies

My friend Anita gave me an envelope with a small daisy on it that had glitter in the middle. It was so similar to the small flower on the SU Daisy die but I'm pretty sure it was something else! However I thought I'd make a card and do something similar with the Sizzix Flower Daisy #2 die, Boho Blossoms punch, Itty Bitty Shapes Circle punch and the 1/2" circle punch. I sponged the Whisper White flowers with Daffodil and Regal rose ink and layered them 3 for each flower. The centers are punched circles with Crystal Effects and Dazzling Diamonds Glitter and then punched out flowers over the top!
Whisper White Card, Blushing Bride Layer with texture added from the Perfect Polka Dots Folder, White Top Note stamped with Grass from Inspired By Nature using Pear Pizzazz ink. I cut out a few blades of grass stamped on scratch CS to add a little more dimension and finished it with Pear Seam Binding bow!

Thursday, March 10, 2011

Color Chip Class Card

Check out the video France Martin did on Stampin' Connection using this technique! I decided to do a class card using this technique and here it is. For the ink pad colors I chose: So Saffron, Daffodil Delight, More Mustard and Pumpkin Pie. The main image was embossed with Versa Mark ink and white powder on Glossy CS. I cut out the Oval Scallop frame with the Big Shot then ran it through using the Polka Dots Folder to give it some texture.
 I cut my glossy panel 5" x 3-3/4" then cut 4 large Post-it note strips 1-1/4" wide each.
Emboss the image first and then mask as follows:
Starting at the left side, place the first post-it strip along the edge, then the next post-it at the edge of the first and so on until the panel is covered exactly.
Remove the first strip on the left and sponge the lightest color then replace the strip. Next remove the second strip and sponge the next lightest color and replace the strip after sponging then continue with the next two doing the same.
~Paper: Base Card Whisper White CS, Scallop Oval, Butterflies & Frame Whisper White CS, Greenhouse Gala DS paper, Glossy CS.
~Accessories: Paper-Piercing tool, Big Shot, Scallop Oval Frame Die, Polka Dots Embossing Folder, White Taffeta Ribbon, Basic Pearls.
~Stamps: Upsy Daisy

Tuesday, March 8, 2011

Photo Stamping

I wanted to make some masculine cards using landscape photos. For the main image I printed the photo from google images and then using Stazon Black ink and Nature Silhouettes and Plant Hope stamp sets. I used the bottom of the Stazon pad (direct to paper) to fill in the very bottom under the wolf on the photo. The base card is Night of Navy CS with a Bravo Burgundy CS mat. Very simple card with no frills and easy to mail!
Google image printed on photo paper


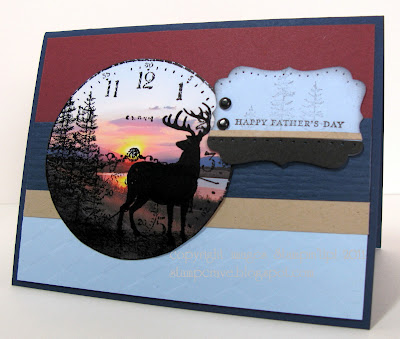
For this card I added some texture using the Big shot and texture plates! I also used the Decorative Label punch divided between two colors with a strip of Crumb Cake CS to tie it in with the strip across the card!
I liked the look of the clock face from Sense of Time stamp set! Again I used Nature Silhouettes and Plant Hope stamp sets with Stazon Black ink. ~Paper: Bashful Blue CS, Night Of Navy CS, Burgundy CS and Crumb Cake CS, Photo Paper.
Try some photo stamping!

This image I took on my walk on one of the walking trails here locally! Beautiful Northern California!

Sunday, March 6, 2011

Stylish Blogger Award


How fun and encouraging to recieve this stylish blogger award!!!
Thank you to Kathy http://inkinguptheplace.blogspot.com/ for choosing me! Be sure to check out her wonderful blog!


When you receive this award you are to:
1) thank the person who gave this award and link it back to their blog
2) share 8 things about yourself
3) pass this award to 8 other individuals that you have recently discovered
4) leave a comment so that they can pass along the recognition!


8 things about me:
1) My Boston Terrier on the left in the picture on my blog, sleeps with me under the covers every night!
2) I absolutly LOVE Purses/Handbags and I change them quite frequently, in fact I'm such a nut that a friend gave me an illistrated History book on handbags! Yes such a thing exists!
3) I love NFL Football! Colts, Packers and Steelers in particular!
4) I love Art, History and Music, stamping is my art and creative outlet!
5) I grew up in the country, raised sheep, pigs, cows and various poultry and was in 4-H for 6 years.
6) I have a Cosmetology License and worked in a full service salon for 3 years but don't currently work in that profession!
7) God, My Husband, 4 boys and friends are the most important thing in my life!
8) I'm a girly girl in spite of raising all boys! I love make-up, jewlery and all that girly stuff!

There are so many wonderful blogs out there, I will have a hard time choosing just 8 people to pass this award on too! Be sure to visit them and check out their work!

Here are my 8 choices:
Regina Andari  http://workinouttheinks.blogspot.com/
Tiffany Bauer http://www.mycraftyworld.blogspot.com/
Sandy Hoefakker http://www.stampinsandy.com/
Melanie Schulenberg http://www.pocketsofinspiration.com/
Patty Bennett http://pattystamps.typepad.com/pattys_stamping_spot/
Kim Peck http://www.kpeckstamps.typepad.com/
Lisa Hensley http://ponygirl40stamps.blogspot.com/
Laura Leuenberger http://www.stamplaura.blogspot.com/
Related Posts Plugin for WordPress, Blogger...